US
Current Language
×
English

Select a language:

Contact your local Tektronix office:

Contact Us
Toggle Menu
US
Current Language
×
English

Select a language:

Contact your local Tektronix office:

Contact Us

Working from Home

 
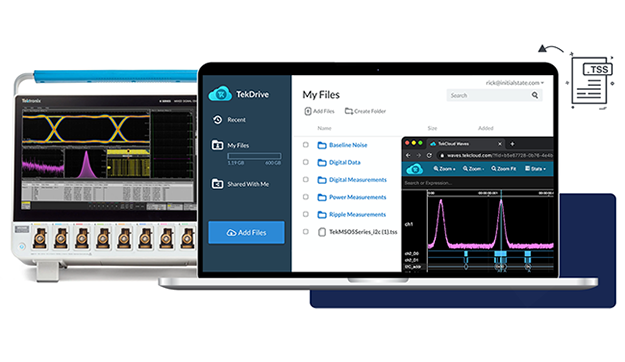
TekDrive is a collaborative test and measurement data workspace that allows users to upload, store, search, download, organize, and share any files from any connected device. TekDrive makes your test, measurement, and engineering data accessible to you, your team, and your partners, instantly and securely. It is a central location where you can keep all your and your team's data, easily accessible from anywhere.
 
TekDrive is perfect for people who have important data spread across several devices like an old work computer, a USB stick, an over-filled hard drive kept on a scope, an on-premise server, or any other unscalable, unsharable, limited-space format location or media. It provides highly scalable and accessible storage space for all your test and measurement data, which can be easily shared with your team or other stakeholders.
Easily share test data with TekDrive
Benefits of TekDrive

TekDrive is a powerful workspace that allows seamless collaboration, sharing, and integrations. Here are some of the prominent benefits of this capability. 

Integrations with Scopes

TekDrive can be easily integrated with an oscilloscope or other supported instruments. Mounting the workspace directly on a scope allows you to create a secure window into your files, folders, and data. You can use this storage like any other drive, only better, as you'll be backed by the immense power of instant sharing and frictionless accessibility with TekDrive. An easy QR-based pairing mechanism allows you to integrate supported instruments with your TekCloud account quickly and securely. To ensure the further safety of your data, you can configure security settings that enables you to fully control access to your drive on shared instruments.

TekDrive also allows you to save your data directly from the scope to a folder on your drive, for later access and collaboration. It supports several save options, so you can save images, waveforms, tables, plot data, and even entire sessions. You can even set it up so that your data is automatically saved when a trigger is activated. Since this is a collaborative workspace, you and your colleagues can recall or reopen any file to access data at any time or to continue a session on a different day, even with a different instrument or in off-scope software like TekScope.
 
Anywhere Access

Another great feature of TekDrive is that it can be accessed from any device, be it a mobile phone, a tablet, or a computer. The browser-based access application is responsive to screen sizes and network situations. Coupled with scope integration, this means you can immediately access data from your scope at your desk, at home, or share it across the globe. A particularly useful combination is to use E*scope or TekScope for remote control and use TekDrive for easy data storage and organization – creating a fully remote scope experience. 

Shareable

In this increasingly remote world, it is crucial to be able to share your data with team members who might be located across the office or across the globe. TekDrive delivers quite spectacularly on this front, as collaboration is built-in from the very beginning. You can manage file and folder access with as many contributors as you like. There are no price tiers or ranges depending on the number of collaborators, allowing you to collaborate with unlimited users at the same cost. 

With the simple access management system, you can control who accesses the files and folders on the drive, from internal team members to stakeholders outside your organization. You can grant access to a team member when their collaboration is required, and revoke access when a member doesn't require it. TekDrive also allows you to automatically send invitations and reminders when you share data with others.

Think about this. Share a single folder with your team members. Then, go into the lab. Mount your TekDrive, and save files to that folder. The instant you save while sitting in front of the scope, your team will have shared access to that data from anywhere. Collaboration on scope data has never been easier. 

See Waveforms in a Browser

Once any data is saved on the TekDrive, you can easily open it directly in a browser on any device. You can open any kind of data, including Waveforms (.wfm), Sessions (.tss), or any other supported file (.isf, .csv, and more) on the browser or even your smartphone or tablet in full resolution, with no extra software required. The inbuilt viewer in TekDrive allows you to view, inspect, and analyze your data directly in the browser. Functions you can perform include:

Add annotations to the data
Zoom, pan, inspect, add cursors, and take measurements
Use inline math to transform and filter data in real-time
Run and display statistics and certain measurements on the data
 
How to Set Up and Use TekDrive on Any Device

Setting up TekDrive on your scope and later on any device is a simple process. 

1. On your scope, go to File > File Utilities
2. Go to 'Mount' at the bottom of the dialog box
3. Click on 'TekDrive' under 'Drive Type' and name the drive 
4. Choose an auto disconnect option ('Power cycle', 'never', or 'custom'), if applicable
5. Click on 'Connect to TekDrive' at the bottom of the screen
6. A shortcode and URL appear, which you can enter on any device to pair your TekDrive account with the scope. 
7. On the scope, it says "Activation successful!" Click now on 'OK, mount TekDrive'
 
The TekDrive is now connected to the scope, and it can be seen as if it was any drive. Now, you can save and recall files using the same experience as a local or USB drive – but with the superior capability of TekDrive. 

View data in your browser with TekDrive

How to Share Data from TekDrive

Sharing any data with external collaborators is also very easy using TekDrive. 
1. Go to the TekDrive browser and right click on a file or folder
2. Click 'share'
3. Add the email address of your team members or other collaborators under 'Shared With'
4. Click on 'Add' and 'Done' and the file is instantly shared with your coworkers!
5. If your colleagues are added to a specific folder on the drive, they get instant access any time you add new data to that folder.
 
Thus, integrating the TekDrive with any scope and saving and sharing your data with your team is seamless, easy, and secure with TekDrive.
You can sign up for a 14-day free trial of TekDrive, no payment method required, here.


Available M-F 6am - 5pm PST

Media Type
MODEL or KEYWORD

US
Current Language
×
English

Select a language:

Contact your local Tektronix office:

Contact Us
Toggle Menu
US
Current Language
×
English

Select a language:

Contact your local Tektronix office:

Contact Us

Blog

Oscilloscope analysis with the 6 Series B MSO from Tektronix

Advanced Oscilloscope Analysis – 4 Unique Capabilities with the 6 Series B MSO

Thursday, July 14, 2022
With the lowest input noise and up to 10 GHz analog bandwidth, the 6 Series B MSO provides the best signal fidelity for analyzing and debugging today's embedded systems with GHz clock and bus speeds. The remarkably innovative pinch-swipe-zoom touchscreen user interface coupled with a large high-definition display and up to eight FlexChannel™ inputs, each of which lets you measure one analog or …

Posts

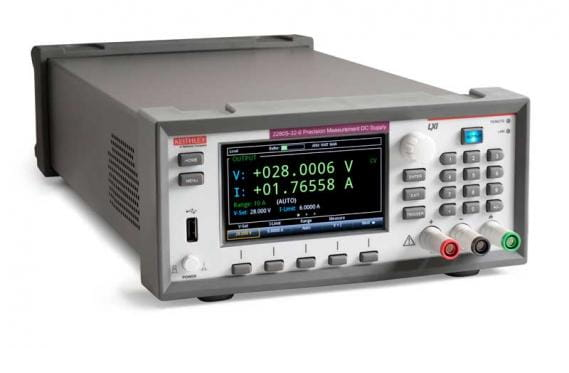
Different 2400 Graphical Series SMUs
Using Your Source Measure Unit as a Power Supply Friday, August 12, 2022
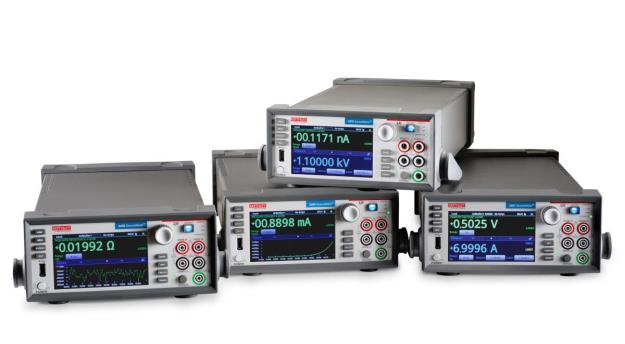
Keithley’s line of Touch Test Invent™ graphical Instruments have the ability to locally run custom scripts written in the Test Script Processor (TSP™) language. These scripts allow the instrument to execute code in real time written by you. The example script provided allows a 2400 Series Graphical SMU to function as a power supply by outputting a constant wattage. A traditional power supply …
DAQ6510 being turned on by an engineer.
Generate Customer Scripts on Your Instrument with Test Script Processor Technology Friday, August 12, 2022
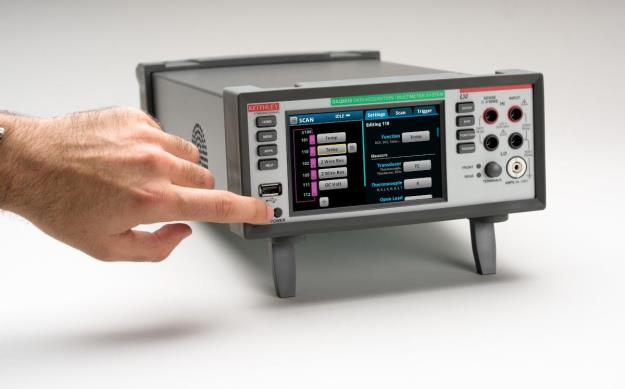
Keithley’s Touch Test Invent™ instruments feature ability the to create TSP applications. These applications can potentially serve unlimited purpose, as users can generate custom scripts to suit their specific and dynamic needs. Created internally, the TSP Calculator App allows users to form simple mathematical functions on their Touch Test Invent instruments. Features The TSP Calculator can …
Automotive engineer testing CAN bus with 2 Series mixed signal oscilloscope
Automotive Customers Find Improved Access and Collaboration in 2 Series MSO Remote Capabilities Wednesday, August 10, 2022
Cars have taken us where we needed to go for over a century. In that time, the industry has moved from one that focused on hardware and mechanical features, like horsepower and torque, to one that prizes features and functions primarily enabled by software, such as driver-assistance features and infotainment options. We find ourselves in the middle of a fast-moving transition to a future where software-defined vehicles (SDVs) are the norm, not the exception.
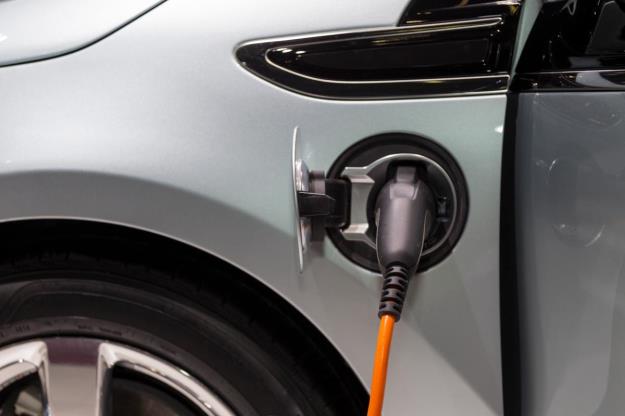
Electric car charger
Characterize Self-Discharge Behavior Faster with the DMM7510 Tuesday, August 9, 2022
Rechargeable batteries are appearing in more devices than ever before. We are requiring these batteries to hold more energy, last longer and charge faster. This is even more critical in applications such as electric vehicles, where batteries must perform to the highest standards while remaining small and lightweight. This makes it critical to catch failures in the batteries before they are placed …
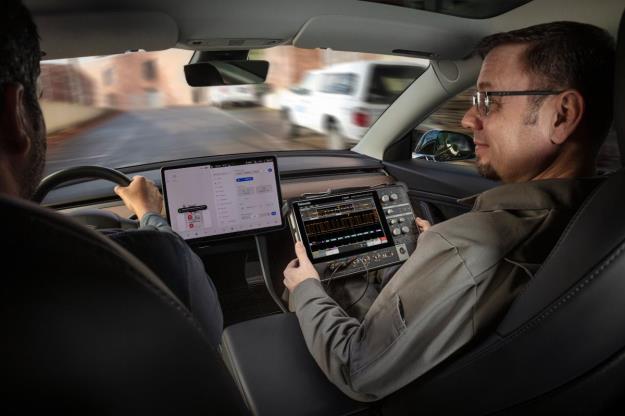
Automotive testing with the 2 Series Mixed Signal Oscilloscope
Bringing Portability and Power to the Automotive Industry with the 2 Series MSO Thursday, July 14, 2022
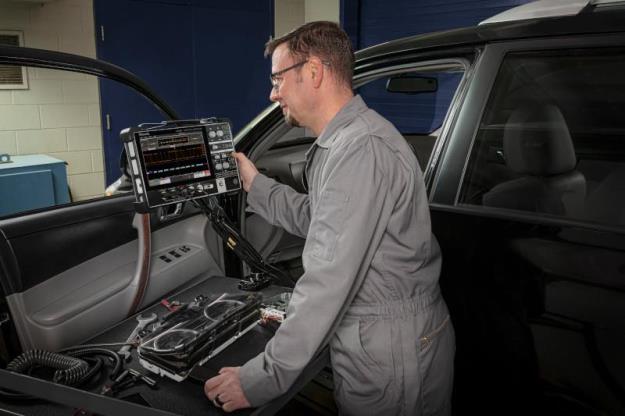
The modern automotive industry moves quickly, and automotive engineers and technicians need the right tools at their fingertips to identify issues quickly and easily. There are many diagnostic tools that analyze the performance of different vehicle systems on any given day, but these instruments almost always include an oscilloscope, which displays different voltages and helps automotive …
Oscilloscope analysis with the 6 Series B MSO from Tektronix
Advanced Oscilloscope Analysis – 4 Unique Capabilities with the 6 Series B MSO Thursday, July 14, 2022
With the lowest input noise and up to 10 GHz analog bandwidth, the 6 Series B MSO provides the best signal fidelity for analyzing and debugging today's embedded systems with GHz clock and bus speeds. The remarkably innovative pinch-swipe-zoom touchscreen user interface coupled with a large high-definition display and up to eight FlexChannel™ inputs, each of which lets you measure one analog or …
NASA’s James Webb Space Telescope reveals emerging stellar nurseries and individual stars in the Carina Nebula that were previously obscured.
Tektronix Innovation Bolsters the Future of Space Exploration Wednesday, July 13, 2022
As the phenomenal new images from the James Webb Space Telescope came out this week, letting us see farther into space than ever before, Tektronix and Keithley are honored to be on the contributors list for the telescope. “Keithley Instruments, Tektronix company, worked with the NASA Glenn Research Center in Ohio to perform low level measurements for the cryogenic development on the James Webb …
Keithley 2280S DC Power Supply
Forming the Best Solution for Battery Formation and Aging Tuesday, July 12, 2022
Current markets are leading to high demand for battery cells. One way for manufacturers to increase throughput is to reduce the time spent making each battery. The formation and aging stage is the most time consuming part of the cell manufacturing process. Ensuring that the right equipment is used for the job can help with some of the challenges facing formation and aging. What is Formation and …
E/V Battery
Grade A Solutions for Battery Grading Wednesday, June 29, 2022
Current technology markets are demanding more out of our batteries than ever before. These batteries are being pushed to charge faster, hold more and last longer. Makers of electric vehicles need batteries to be smaller, lighter, safer, and cheaper. All of these pressures lead manufacturers to one question: How do we guarantee the batteries live up to these tight standards? Why Grade …

US
Current Language
×
English

Select a language:

Contact your local Tektronix office:

Contact Us
Toggle Menu
US
Current Language
×
English

Select a language:

Contact your local Tektronix office:

Contact Us

Available M-F 6am - 5pm PST

Media Type
MODEL or KEYWORD

US
Current Language
×
English

Select a language:

Contact your local Tektronix office:

Contact Us
Toggle Menu
US
Current Language
×
English

Select a language:

Contact your local Tektronix office:

Contact Us

Discussing Trends Related to ISO 17025 Accredited Calibrations

The trend toward requiring ISO 17025 accredited calibrations continues to increase. Find out why and the factors driving it in this brief trend talk with two of our Tektronix experts.

You’ll learn:

  • Specific industries that are driving this trend, and the flow through the industry ecosystem
  • The benefits of ISO 17025 including traceability and risk management
  • What to look for in an ISO 17025 accredited calibration services provider

Guy Robinson, Calibration Services Manager and ASQ Certified Auditor, joins Rob Hansen, Business Development Manager, for this illuminating discussion.

Read the transcript.

Rob Hansen (00:07):

Hi, everyone. My name is Rob Hansen, and I'm a Business Development Manager with Tektronix in the Calibration and Repair Services side of our house. We're here today to talk about 17025 Accredited Calibration. Guy, would you like to introduce yourself?

Guy Robinson (00:25):

Yeah. Thank you, Rob. My name's Guy Robinson. I'm the Territory Service Manager for the Texas Region for Tektronix Service, and I'm responsible for our labs in Houston, Austin, and Dallas. I also have a separate role with a Quality background because I have served in our Quality Department for many years. And I'm an Assessor for A2LA, which is one of the organizations that we use as our accrediting body, and I've been asked to talk a little bit about the things that are moving toward 17025.

Rob Hansen (00:55):

Very good. So, Guy, we've started to see more and more interest in 17025 Accredited Calibration. What do you think's driving this growth?

Guy Robinson (01:10):

Yeah, there is definitely a change and, in fact, every year, the number of assessments and assessors is growing in companies that provide that service, like A2LA, and Perry Johnson, and ANAB. And the reason seems to be from several different fronts. One is it's driven by customers. Third-party calibration labs or OEM calibration labs are actually getting requests from customers, asking for an accredited calibration because that accredited calibration is either required of them, by their customers, or as a result of the regulatory requirements that they manage. So, for example, in the aerospace industry, in particular, and in the medical industry in particular, both of those forces are driven by regulatory concerns. And there is no better ISO document for calibration than 17025.

Guy Robinson (02:07):

So, therefore, by asking for that accreditation, they can meet the requirements for things such as the AS9100 requirement for calibration or the 13485 requirement in the medical industry for calibration. So they're being driven by their customers. That's one of the things that's happening. The second thing is that, quite honestly, in the market, having an accreditation is a benefit to a company trying to market their services to other companies by saying, "Look, it's just not me saying I do this well. It's an international body saying that I do this well, and that separates me from my competitors." So those are two examples.

Rob Hansen (02:47):

Sure. Yeah, I agree. So what effect do you think this is having on the rest of the ecosystem, that are suppliers or customers to these industries?

Guy Robinson (02:58):

Yeah, that's a great question because, again, another area that's driving this is, there are requirements, now, that are called flow-down requirements. So, for example, and probably the best way to express it is to give an example. If I am a manufacturer of goods for the U.S. Military or the Space Industry, or SpaceX, or any of these places, more than likely, there is a requirement in the regulatory component of their business that says, if you purchase services from a vendor, or you buy parts, or you buy calibration services, you are responsible for the quality of that vendor's work.

Guy Robinson (03:36):

And you have to force down the requirements that we give to you, Mr. Provider, to make sure that all of those people that you're going to are also meeting the requirements of that. In other words, if you say you're accredited, then we expect you to use accredited work from other people.

Guy Robinson (03:54):

So, then you end up having smaller industries which may not normally accredit themselves, being driven and pushed toward the accreditation to meet the requirements of some of their customers, even if it's not regulatory itself, as a supplier to those customers, they're being held to a higher standard because of the flow-down requirements.

Rob Hansen (04:13):

Sure, so some companies, they outfit their own internal labs. Others use smaller third-party, sometimes local, houses as their service providers. Can you talk a little bit about the path to accreditation, what does it take for these companies to become accredited?

Guy Robinson (04:31):

Yeah, and this is something that I, kind of, specialize in, working with A2LA, and having done some work on the side for other independent customers. The process to start from scratch is extensive, and it can take six to eight months to get an accreditation, even for a small facility. Only because of the process involving the documentation necessary, gathering all of the required equipment and then making sure that that equipment itself is accredited, making sure that people are trained properly, and all along the way, everything has to be documented. And that all has to be provided to the accrediting body. Let's just assume it's A2LA for this example, which is the American Association for Laboratory Accreditation.

Guy Robinson (05:17):

Then, they have to take assessors and assign them to go out to that facility and literally hands-on... well, sometimes, remotely nowadays with COVID, but typically hands-on, spend several days at that facility, going through the entire process of looking at everything from training records to equipment records, and actually having technicians or engineers demonstrate the calibration process in front of the assessor. In fact, the requirement is that every parameter that is on the scope of accreditation be observed by an assessor, and approved.

Guy Robinson (05:47):

So, all of that takes time and practice and effort. By the time deficiencies are resolved, because it's rare not to have some things that need to be corrected, it can be, as I said, a six to eight-month process. Once you establish that accreditation, you still have to renew it every year. And part of that renewal is, there's some paperwork involved in the yearly renewals. But every two years, that same assessment has to be repeated, each time. And, as a lab improves, then it gets easier. But there is an overhead cost. There's the cost of the assessment. There's the cost of paying for the assessors, because A2LA isn't a business. Right?

Rob Hansen (06:23):

Sure.

Guy Robinson (06:24):

You pay a cost for the assessment itself. You pay a cost for the assessors to come out and do the work. And, yet, you also pay a cost within your organization for having someone that's dedicated to keeping all that recordkeeping done. In a small organization, that can be very, very challenging, because you've got records of equipment, calibration, training, all of that has to be maintained by someone. So it's quite an investment in an organization's time and money.

Rob Hansen (06:53):

Sure. Sure. It sounds like a lot work. Hey, you know I've heard customers talk about, or show some confusion, about the difference between a Z540 accredited cal versus an ISO 17025 accredited cal. Maybe you could clear that up, compare and contrast those two a little bit.

Guy Robinson (07:13):

Sure. Z540.1 is an American standard. It was made in America, for American businesses, and it's run by ANSI, which is the American National Standards Institute. It is not an international standard. So, first of all, the most key point here, is it's not really accepted outside of the United States. You can't provide an ANSI Z540.1 calibration to someone in Europe. They would not accept that. And not to mention the fact that it's been rescinded. But people still use it in the United States because it meets the needs of most manufacturing businesses in the country.

Guy Robinson (07:51):

You can have an accreditation for it on your certificate. So, if I go to A2LA, and I say, "Listen, I want to be accredited to 17025, but I have a whole bunch of customers who value Z540.1, and I also want you to say that I'm accredited to that standard," we do that. And they will... There's some differences between the two, and A2LA has a separate section where they check all of those differences to make sure, and it's almost always that if you can meet the standard for 17025, you can meet it for Z540.1. But they check the specifics on that.

Guy Robinson (08:25):

So, then you're assured that a person, in fact, has been... I guess the way to think it is, they've been verified. They've been inspected and verified, and certified by A2LA, because anyone on the United States can claim compliance to Z540.1. I can open up a shop tomorrow and, let's say, do Pipettes in my garage, and I can tell you, "Listen, I'm a quality guy. I know the details. I can guarantee you that I comply with all the requirements of Z540.1." But that's not the same as having an accreditation. And the accreditation, again, is an independent body certifying that you can do it. It doesn't make it any better of a calibration, except for the fact that my word is now verified by someone else.

Guy Robinson (09:10):

So, when you get accredited calibration for Z540.1, you're getting that as a rider onto the scope of accreditation, usually, to 17025. That's, kind of, how it works. So it's more along the lines of an official statement and verification of your compliance to the standard, rather than just you saying so.

Rob Hansen (09:32):

Very good. Also, I think it's probably a key difference to make sure everyone's clear there's a difference between an accredited calibration and an accredited lab. Correct?

Guy Robinson (09:41):

That's correct and, in fact, it's interesting because every lab has its own... every organization has its own quality system, in order to have any kind of certification. And you can have a lab... You cannot... When you are an accredited lab, there is a document called a Scope of Accreditation that says, "Well, just because you're an accredited lab doesn't mean you can do everything under the sun." So you've been accredited on this Scope of Accreditation document to be able to do certain parameters, like resistance or voltage or temperature or pressure or torque, or something like that. But, just because you have those things, you can't claim that you also are accredited for light, because you haven't been assessed for that particular parameter. So you are an accredited lab, but that doesn't mean that the... Maybe you do calibrate light, but if that particular parameter isn't also accredited on your scope, then you can still be an accredited lab, but not provide an accredited calibration for that.

Guy Robinson (10:48):

The opposite of that is there are many places that say, "Well, I want to do business with an accredit lab." But they never ask for an accredited calibration. So they say to us, "You have to be accredited. We expect you to maintain your accreditation, but we're never going to ask you for an accredited certificate, because we don't need that, and we don't want to pay for that because there's typically a different cost for that." And that's because they believe that, "Because you are accredited, that assures us, or makes us comfortable, that no matter what kind of calibration you're going to do, that you're going to do it better than someone who's not accredited." That's the reasons.

Rob Hansen (11:21):

Yeah. Very good. Well, thanks, Guy. Are there any final thoughts or resources that you could point people to, to learn more about ISO 17025?

Guy Robinson (11:32):

Well you know, we've actually done quite a few things in the Tektronix Catalog, I think, that are available to people. To answer the kinds of questions that sometimes come up of, "Well, what kind of cal do I need? Do I need accredited cal, or do I need a... And what's the difference?" We have a few things like that. But I think it's clear that there is a trend, and the trend is that the level of demonstrated performance is going up, in all industries across the board. And companies that see that trend happening can get ahead of it and get accredited, or work with accredited companies like Tektronix or the vendors that we use, because we have this system in place already.

Guy Robinson (12:11):

We have these flow-down things in place, and if there's a question about that, and you don't really know what to do, well then yeah, you can pick up the phone and ask for assistance. And someone who knows how to handle that will call you back and sort that out. But yeah, I think there's generally an accepted expectation that the requirements for all industries are rising as a result of the international standard.

Rob Hansen (12:34):

Good. Well, thanks, Guy. Appreciate your time, appreciate the education here, today.

Guy Robinson (12:39):

Thank you, very much, for having me. I hope it was helpful.

Rob Hansen (12:42):

Yeah. Be sure to check https://www.tek.com/services/calibration-services for additional information.
US
Current Language
×
English

Select a language:

Contact your local Tektronix office:

Contact Us
Toggle Menu
US
Current Language
×
English

Select a language:

Contact your local Tektronix office:

Contact Us

Download

Download Manuals, Datasheets, Software and more:

DOWNLOAD TYPE
MODEL or KEYWORD

Feedback

Blog

New TekDrive Python SDK Allows for Seamless Integration into Your Workflow


Oscilloscope cloud software integration with TekDrive

Getting data off your oscilloscope and into the hands of a colleague or a processing program can be a hassle — and that is exactly the problem that TekDrive solves. TekDrive allows effortless collaboration by transferring, storing, organizing, managing and sharing data and files. And now doing all of that is even easier thanks to the new Python SDK!

The TekDrive API allows you to perform multiple actions within TekDrive in any language. The Python SDK simplifies its usage even further — making uploading, moving, renaming and downloading files a piece of cake.

I am going to show you how painless analyzing oscilloscope files can really be with a use case: we’ve used TekDrive to hold our data files and now we will pull them locally to process in some other program and then share them with our colleagues.

Let’s get started!


Installation

Thanks to the SDK being published on the Python Package Index, installation is as easy as:

$ pip install tekdrive

You can view more details about the package here: https://pypi.org/project/tekdrive/

TekDrive Account Creation

To access your scope files from anywhere with an internet connection, you need to set up a TekDrive account. Registering for an account is easy — just follow the link and sign up: Register for TekDrive

To manipulate files and folders with the SDK, you need an access key with the correct permissions. You can create an access key by clicking on your username in the top right corner and then selecting “Settings”. Under “Access Keys Management” click the “Generate an Access Key” button. You can choose to give your access key as much permission as you like. The minimum permissions for this specific example are create, update, and read.

Once you’ve generated your key, be sure to save it somewhere secure since you won’t be able to view it again.

The Use Case

Did you know that you can upload files directly from your scope to TekDrive? The process is easy — it allows you, or whoever is running your lab tests, to send the data files directly to the TekDrive platform. You can also upload files directly from your PC.

Now that you’ve got your files in TekDrive, you can use the SDK to interact with them! For this example, let’s say that you’ve put all the files you want to download and analyze into a specific folder, and you want to upload them post-analysis into a different folder.

This script will go through the following steps to get your analyzed files uploaded to the cloud:
1. Search for the folder holding your raw files by name.
2. Create a new folder to hold your files after you’ve downloaded them.
3. Download each file in the folder locally.
4. Move each file into a new folder after downloading.
5. Once analyzed, upload transformed files to TekDrive.

"This is a block quote. It pulls a quote from the copy to draw attention to it, make the page more interesting, and break up the copy."

The Code

This part will walk you through each piece of the code, but if you’d like to just copy the entire script and give it a try, go to the end of this article for the full code. 

If you’d like to check out the SDK documentation for yourself, you can find it here.

The first thing we need to do is import our TekDrive SDK. datetime will let us timestamp our folder name and os is needed for downloading and uploading files.


Next, we need to add the access key you created inside of your TekDrive account. We also initialize the path for our downloads — it will be the same location as the script.


main() is where all the magic happens. We start by initializing the TekDrive module as td.


Now you can search for the name of the folder holding the files you want to analyze. In this example it’s named “to_be_analyzed”. You can then pull the folder id from your search results.

Next, you can create a folder instance using the id you just pulled called folder to analyze. You can also create a new folder and add the current date to its name so that we know what day the files were pulled for analysis. The folder name will look like analyzed-Jun142021.


Since you have the folder where our files to be analyzed are sitting, you can pull them one by one for download and then move them to your new folder. This way you won’t accidentally analyze any files twice.

You can create a file instance for each file in the folder and then download it. The downloaded file will have the same name as the TekDrive file (you can change it if you want to). Then you can move the file to the new folder you created earlier.


This is the part where you analyze your files with whatever you’d like: LabVIEW, Python, Excel, MATLAB, JMP. Just move the final file into a folder in the same directory as your script. In this example, I named the folder “analyzed files” and wanted them to keep the names I had given them.

First, you need to find the path to the folder holding our analyzed files. Next, you need to find the parent folder id of the folder you pulled the original files from in TekDrive. You could instead upload the files to another new folder using the same steps to create a folder that we did above.


Using the path we found, you then iterate over the folder’s contents and upload them back into TekDrive.

That’s it! That is how you can programmatically find files that need analysis, download them, analyze them, and then upload them into a platform that can be accessed from anywhere with an internet connection — even from your scope!

You can find the script in its entirety here

"This is a block quote. It pulls a quote from the copy to draw attention to it, make the page more interesting, and break up the copy."

Katrina B., Brilliant Designer

Lorem Ipsum Lorem ipsum dolor sit amet, consectetur adipiscing elit. Maecenas ullamcorper augue in suscipit imperdiet. Donec auctor ipsum sed dictum eleifend. Nulla mattis lobortis fermentum. Donec eu ipsum sodales nibh luctus pulvinar pulvinar id arcu. Suspendisse auctor nibh non interdum convallis. In mattis commodo fringilla. Pellentesque porttitor volutpat arcu, ut sagittis est. Aenean imperdiet tempus orci vitae scelerisque. Sed vel commodo felis, vel sagittis ante. Morbi non sagittis lectus. Ut varius facilisis felis a consectetur. Nullam sit amet velit suscipit, tincidunt purus vel, dapibus justo.

This is the CTA of where we want you to go from this blog. Cras ut nulla libero. Integer non vulputate diam. Quisque consectetur lorem sit amet quam lacinia pharetra. Phasellus nec ligula nec risus aliquam malesuada. Duis eget elit massa.


US
Current Language
×
English

Select a language:

Contact your local Tektronix office:

Contact Us
Toggle Menu
US
Current Language
×
English

Select a language:

Contact your local Tektronix office:

Contact Us

Download

Download Manuals, Datasheets, Software and more:

DOWNLOAD TYPE
MODEL or KEYWORD

Feedback

Rick Kuhlman
Thursday, August 19, 2021  |  Rick Kuhlman

Blog

New TekDrive Python SDK Allows for Seamless Integration into Your Workflow


Oscilloscope cloud software integration with TekDrive

Getting data off your oscilloscope and into the hands of a colleague or a processing program can be a hassle — and that is exactly the problem that TekDrive solves. TekDrive allows effortless collaboration by transferring, storing, organizing, managing and sharing data and files. And now doing all of that is even easier thanks to the new Python SDK!

The TekDrive API allows you to perform multiple actions within TekDrive in any language. The Python SDK simplifies its usage even further — making uploading, moving, renaming and downloading files a piece of cake.

I am going to show you how painless analyzing oscilloscope files can really be with a use case: we’ve used TekDrive to hold our data files and now we will pull them locally to process in some other program and then share them with our colleagues.

Let’s get started!


Installation

Thanks to the SDK being published on the Python Package Index, installation is as easy as:

$ pip install tekdrive

You can view more details about the package here: https://pypi.org/project/tekdrive/

TekDrive Account Creation

To access your scope files from anywhere with an internet connection, you need to set up a TekDrive account. Registering for an account is easy — just follow the link and sign up: Register for TekDrive

To manipulate files and folders with the SDK, you need an access key with the correct permissions. You can create an access key by clicking on your username in the top right corner and then selecting “Settings”. Under “Access Keys Management” click the “Generate an Access Key” button. You can choose to give your access key as much permission as you like. The minimum permissions for this specific example are create, update, and read.

Once you’ve generated your key, be sure to save it somewhere secure since you won’t be able to view it again.

The Use Case

Did you know that you can upload files directly from your scope to TekDrive? The process is easy — it allows you, or whoever is running your lab tests, to send the data files directly to the TekDrive platform. You can also upload files directly from your PC.

Now that you’ve got your files in TekDrive, you can use the SDK to interact with them! For this example, let’s say that you’ve put all the files you want to download and analyze into a specific folder, and you want to upload them post-analysis into a different folder.

This script will go through the following steps to get your analyzed files uploaded to the cloud:
1. Search for the folder holding your raw files by name.
2. Create a new folder to hold your files after you’ve downloaded them.
3. Download each file in the folder locally.
4. Move each file into a new folder after downloading.
5. Once analyzed, upload transformed files to TekDrive.

The Code

This part will walk you through each piece of the code, but if you’d like to just copy the entire script and give it a try, go to the end of this article for the full code. 

If you’d like to check out the SDK documentation for yourself, you can find it here.

The first thing we need to do is import our TekDrive SDK. datetime will let us timestamp our folder name and os is needed for downloading and uploading files.


Next, we need to add the access key you created inside of your TekDrive account. We also initialize the path for our downloads — it will be the same location as the script.


main() is where all the magic happens. We start by initializing the TekDrive module as td.


Now you can search for the name of the folder holding the files you want to analyze. In this example it’s named “to_be_analyzed”. You can then pull the folder id from your search results.

Next, you can create a folder instance using the id you just pulled called folder to analyze. You can also create a new folder and add the current date to its name so that we know what day the files were pulled for analysis. The folder name will look like analyzed-Jun142021.


Since you have the folder where our files to be analyzed are sitting, you can pull them one by one for download and then move them to your new folder. This way you won’t accidentally analyze any files twice.

You can create a file instance for each file in the folder and then download it. The downloaded file will have the same name as the TekDrive file (you can change it if you want to). Then you can move the file to the new folder you created earlier.


This is the part where you analyze your files with whatever you’d like: LabVIEW, Python, Excel, MATLAB, JMP. Just move the final file into a folder in the same directory as your script. In this example, I named the folder “analyzed files” and wanted them to keep the names I had given them.

First, you need to find the path to the folder holding our analyzed files. Next, you need to find the parent folder id of the folder you pulled the original files from in TekDrive. You could instead upload the files to another new folder using the same steps to create a folder that we did above.


Using the path we found, you then iterate over the folder’s contents and upload them back into TekDrive.

That’s it! That is how you can programmatically find files that need analysis, download them, analyze them, and then upload them into a platform that can be accessed from anywhere with an internet connection — even from your scope!

You can find the script in its entirety here


US
Current Language
×
English

Select a language:

Contact your local Tektronix office:

Contact Us
Toggle Menu
US
Current Language
×
English

Select a language:

Contact your local Tektronix office:

Contact Us

Download

Download Manuals, Datasheets, Software and more:

DOWNLOAD TYPE
MODEL or KEYWORD

Feedback

New TekDrive Python SDK Allows for Seamless Integration into Your Workflow


Oscilloscope cloud software integration with TekDrive

Getting data off your oscilloscope and into the hands of a colleague or a processing program can be a hassle — and that is exactly the problem that TekDrive solves. TekDrive allows effortless collaboration by transferring, storing, organizing, managing and sharing data and files. And now doing all of that is even easier thanks to the new Python SDK!

The TekDrive API allows you to perform multiple actions within TekDrive in any language. The Python SDK simplifies its usage even further — making uploading, moving, renaming and downloading files a piece of cake.

I am going to show you how painless analyzing oscilloscope files can really be with a use case: we’ve used TekDrive to hold our data files and now we will pull them locally to process in some other program and then share them with our colleagues.

Let’s get started!


Installation

Thanks to the SDK being published on the Python Package Index, installation is as easy as:

$ pip install tekdrive

You can view more details about the package here: https://pypi.org/project/tekdrive/

TekDrive Account Creation

To access your scope files from anywhere with an internet connection, you need to set up a TekDrive account. Registering for an account is easy — just follow the link and sign up: Register for TekDrive

To manipulate files and folders with the SDK, you need an access key with the correct permissions. You can create an access key by clicking on your username in the top right corner and then selecting “Settings”. Under “Access Keys Management” click the “Generate an Access Key” button. You can choose to give your access key as much permission as you like. The minimum permissions for this specific example are create, update, and read.

Once you’ve generated your key, be sure to save it somewhere secure since you won’t be able to view it again.

The Use Case

Did you know that you can upload files directly from your scope to TekDrive? The process is easy — it allows you, or whoever is running your lab tests, to send the data files directly to the TekDrive platform. You can also upload files directly from your PC.

Now that you’ve got your files in TekDrive, you can use the SDK to interact with them! For this example, let’s say that you’ve put all the files you want to download and analyze into a specific folder, and you want to upload them post-analysis into a different folder.

This script will go through the following steps to get your analyzed files uploaded to the cloud:
1. Search for the folder holding your raw files by name.
2. Create a new folder to hold your files after you’ve downloaded them.
3. Download each file in the folder locally.
4. Move each file into a new folder after downloading.
5. Once analyzed, upload transformed files to TekDrive.

The Code

This part will walk you through each piece of the code, but if you’d like to just copy the entire script and give it a try, go to the end of this article for the full code. 

If you’d like to check out the SDK documentation for yourself, you can find it here.

The first thing we need to do is import our TekDrive SDK. datetime will let us timestamp our folder name and os is needed for downloading and uploading files.


Next, we need to add the access key you created inside of your TekDrive account. We also initialize the path for our downloads — it will be the same location as the script.


main() is where all the magic happens. We start by initializing the TekDrive module as td.


Now you can search for the name of the folder holding the files you want to analyze. In this example it’s named “to_be_analyzed”. You can then pull the folder id from your search results.

Next, you can create a folder instance using the id you just pulled called folder to analyze. You can also create a new folder and add the current date to its name so that we know what day the files were pulled for analysis. The folder name will look like analyzed-Jun142021.


Since you have the folder where our files to be analyzed are sitting, you can pull them one by one for download and then move them to your new folder. This way you won’t accidentally analyze any files twice.

You can create a file instance for each file in the folder and then download it. The downloaded file will have the same name as the TekDrive file (you can change it if you want to). Then you can move the file to the new folder you created earlier.


This is the part where you analyze your files with whatever you’d like: LabVIEW, Python, Excel, MATLAB, JMP. Just move the final file into a folder in the same directory as your script. In this example, I named the folder “analyzed files” and wanted them to keep the names I had given them.

First, you need to find the path to the folder holding our analyzed files. Next, you need to find the parent folder id of the folder you pulled the original files from in TekDrive. You could instead upload the files to another new folder using the same steps to create a folder that we did above.


Using the path we found, you then iterate over the folder’s contents and upload them back into TekDrive.

That’s it! That is how you can programmatically find files that need analysis, download them, analyze them, and then upload them into a platform that can be accessed from anywhere with an internet connection — even from your scope!

You can find the script in its entirety here


US
Current Language
×
English

Select a language:

Contact your local Tektronix office:

Contact Us
Toggle Menu
US
Current Language
×
English

Select a language:

Contact your local Tektronix office:

Contact Us

Available M-F 6am - 5pm PST

Media Type
MODEL or KEYWORD